Jan 31, 2006

ARF Tuesdays #5 and Leftover Makeovers

(photo courtesy of Google Images)

My absolute favorite ARF has to be blueberries. When I was growing up my mom often made blueberry pie an always had a stash of blueberry tea in the cabinet. I usually buy them frozen and use them for things like Blueberry Smoothies, Blueberry Oatmeal and of course Blueberry Muffins. Lately I have been buying Blueberry Juice as well. I just love the taste of blueberries. According to the US Highbush Blueberry Council, Researchers at the USDA Human Nutrition Center (HNRCA) have found that blueberries rank #1 in antioxidant activity when compared to 40 other fresh fruits and vegetables." Great taste and good health... how can you lose!

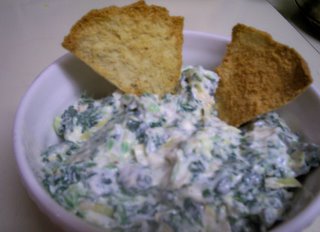
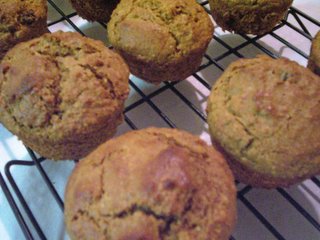
I've been doing some refrigerator cleaning lately and began to use up leftover odds and ends I found. Here are a couple of of my new creations:


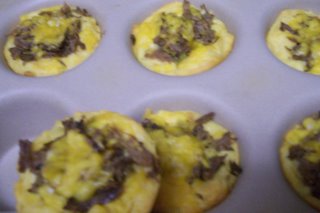
Taco Cups - I've seen lots of similar recipes to this but here's my version. I used a tube of Grands cheddar biscuits I had found on sale at out local market for 99 cents. I molded a half of each biscuit (you know how they are in layers, I split each one in half) into a muffin pan. Into each one I added some leftover refried beans, leftover pot raost which had been transformed into a tostada topping with the addition of green chilis and a few other spices... and then I sprinkled some cheese on top. Bake according to the package directions and ... Viola! Taco Cups :) We had them for lunch with salsa and guacamole on top.

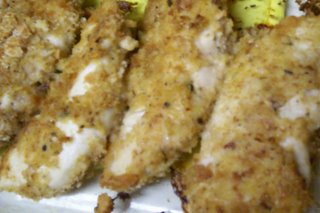
A New Asian Chicken Creation - Not sure if this recipe is anywhere near authentic, but it sure is tasty! I had some leftover crushed pineapple in the freezer so I mixed with a little soy sauce and some of Penzy's Sate Seasoning, a bit of water mixed with corn starch and cooked it with chicken tenders. Served with California Mix veggies and Jasmine rice... yum!

Jan 30, 2006

Guest Blogger #7 - White Trash BBQ

I'd like to introduce Robert from White Trash BBQ as today's Guest Blogger. When I first found Robert's blog I drooled... a blog all about BBQ? Yes! And the pics are mouthwatering. Stop by and pay him a visit, you'll be glad you did!

----------------------------------------------

I’d like to thank Michele for inviting me to guest blog. I hope she’ll return the favor with an appearance on my blog WhiteTrash BBQ. This is my first guest Blogging experience so be gentle.

“High on the hog.” “Living the high life.” “Eating like Kings.” “Bringing home the bacon.” We’ve all heard them. There are a lot of food idioms out there that associate food with prosperity and wealth. How did this happen? Which foods were reserved for the well to do? And which were reviled and given to the, shall we say, “less fortunate?”’

For every food idiom that associates food with wealth, there’s a food stuff. You know what I mean, truffles, chocolates, lobster, etc. but those are for someone else to write about. I’m only going to focus on meat and not other food stuffs because I’m a barbecue guy and let’s face it, barbeque is about meat.

So how does “high on the hog” and “living the high life relate to meat? It’s actually amazingly simple. The better cuts of meat, the choice cuts, the most tender cuts, either from a cow or a pig, all come from the muscle groups of the animals that do the least amount of work. And where on the body do you think that is? Well, on both the cow and pig, it’s “high” on the animal; it’s the back, the part furthest from the ground. “High” on the back of the cow where you’ll find the T-bones, the Filet Mignon, the Prime Rib, the Porterhouse and finally the less desirable sirloin. If you look at the meat around the back legs, you’ll find the rounds. On the front shoulder you find the chuck and underneath that you find the brisket; tough and stringy and worn out from its constant use. The “upper cuts”, are tender only because they don’t do much work and they cook quickly.

In the barbecue belt, back in the mists of time when traditions began, a traditional “Southern Barbecue” was actually the cooking of whole pig over an open fire. Servants or slaves would roast the animal and serve the meat as it cooked to the boss. What did the boss eat while the folks were cooking and cleaning? You guessed it - the fast cooking meat from “high” on the hog. On a pig, those cuts are the Pork Loin, the Rack of Pork, the Tenderloin, the Pork Steaks, and Center Cut Chops. Once the best cuts were served to the master and honored guests. The sirloin, the rounds and the chuck would be served to less important people. What was left was given to the servants, the slaves or the poor White Trash.

But the slaves, the servants and the White Trash got the last laugh. They learned that by slow cooking the tough cuts of meat such as the spare ribs, or the pork shoulder and butt, the lowly cuts of meat were transformed into a dish “fit for a King.” There was magic in the smoke and the art of “low and slow.”

The poor, the slaves and the WhiteTrash all learned how to control a fire so that a full beef brisket or rack of pork spare ribs would cook slowly and tenderize the meat in the process. Good barbeque literally will “melt in your mouth.” Please don’t confuse barbeque with grilling. Grilling is cooking meat quickly directly over high heat. Barbecue is low and slow with fire temperatures rarely exceeding 250 degrees.

In the barbeque belt, most cooks cooked outdoors over wood or charcoal fires. This method became barbeque. In the north, most people lived in cities or in areas where the weather required indoor cooking for many months of the year, but the rules of divvying up the meat remained. The poor, immigrants, the working class and the WhiteTrash were all given the tough cuts of meat. In the north, braising became the method of choice in transforming tough meat to edible goodness.

So the next time you’re looking for a way to stretch your food budget, take a look at beef brisket, pork butt, spare ribs or any of the traditional barbeque foods. Last I looked, pork butt was going for $1.09 a pound and brisket was $2.19 a pound in my local supermarket while the better cuts of pork and beef were all $4.00 a pound or better. A little “low and slow” cooking either over a wood and smoke fire – barbecue, or in a pot and braised will work magic.

Jan 29, 2006

Honey Dijon Chicken

I just finished making up my menus for the next two weeks. I found a recipe for Dijon Chicken from Chef Bek and decided to change it a bit. I think this will work out great and will be a nice change of pace for us. Here's what I'm planning for the next two weeks along with the recipe. This is 12 days worth of menus allowing for leftovers on some nights.

On another note, if you're looking for some great healthy breakfast recipes, check out the Virtual Recipe club round-up for January at the Savory Notebook.

On to the menus...

  • Crock Pot Chili (with some barley thrown in for extra health benefits), biscuits
  • Salisbury Steak, green beans, mashed potatoes
  • Chicken with Sate Seasoning (from Penzey's) .... I'll throw in some pineapple I have in the freezer and soy sauce too...who knows what else... LOL!, California Mix Veggies (frozen), Jasmine Rice (possibly with Curry Powder)
  • BBQ chicken, Crock Pot Baked Beans, Corn on the Cob (frozen)
  • Ground Turkey Shepherd's Pie (no recipe, just a *vision* I have :)
  • Chili Mac
  • Great Northern Beans, Collard Greens
  • Turkey Burgers, leftover baked beans, chips
  • Honey Dijon Chicken, homemade rice-a-roni (with chopped broccoli added in), leftover Northern Beans
  • Pinto Beans, Corn Bread, rice
  • A casserole I am envisioning with ground beef, bell pepper, sweet corn, brown rice, spinach, and cheese (we'll see how it turns out, LOL!)
  • Tacos, Spanish rice, refried beans

Honey Dijon Chicken

4 Tbsp. olive oil
4 boneless-skinless chicken breasts
1/2 c. all-purpose flour
1 medium Onion
3 cloves garlic
3 T. Dijon mustard
1/4 c. honey
1 c. chicken broth

Preperation:

1. Wash Chicken and butterfly it.
2. Slice Onions into 1/4 inch slices.
3. Chop garlic.

Directions:

Butterfly your chicken breasts. Coat with think layer of flour. In a saute' pan, add olive oil over medium high heat. Add the floured chicken breast and cook on one side for 3 to 4 minutes. Flip. Add onions, garlic, and saute' for 3 to 4 minutes. Deglaze your pan with the chicken broth for about 1 minute. Add Dijon mustard and honey, stir all ingredients, and bring to a boil. Salt and Pepper to taste. Remove from heat and serve.

Jan 28, 2006

French Toast and Caramel Maple Syrup

I WISH I had a pic of this to share but my hungry hubby and kiddos dove in before I could grab the camera. :) I guess that is reason enough for anyone to try this recipe, they are picky eaters and all gave thumbs up to this creation!

This morning I walked sleepy-eyed into the kitchen wondering what to prepare for breakfast. I thought of French toast right away but was slightly dismayed at the nearly empty bottle of syrup in the cabinet. A little creativity and a couple of ingredients later we had the perfect solution!

French Toast

2 eggs
1/2 c. milk
1/2 tsp. vanilla
dash salt
dash cinnamon
10 slices bread

Combine milk, eggs, vanilla, salt and cinnamon i na bowl and whisk well. Heat canola oil or butter in a skillet on medium-high heat. dip each piece of bread in the milk mixture, allow excess to drip off and fry a few minutes on each side until golden brown. Serve with butter and Caramel Maple Syrup.

Caramel Maple Syrup

1/2 c. maple syrup
1/4 c. Dulce De Leche
2 Tbsp. sweetened condensed milk

Combine all in a small saucepan and heat over medium heat while stirring constantly. Store any extra in the refrigerator.

Jan 27, 2006

Coffee Cake

A friend of mine gave me this recipe many years ago and it is by far my favorite. It's very easy to make, simple ingredients and so delicious. You can vary the strusel by adding chopped nuts or raisins.

Coffee Cake

Strusel
2 c. flour
1 c. sugar
2 tsp. baking powder
1 tsp. salt
1/3 c. butter or margarine
1 c. milk
1 egg

Strusel
1/3 c. brown sugar
1/4 c. flour
1/2 tsp. cinnamon
3 Tbsp. butter

Mix all with a fork until crumbly.

Heat oven to 350 degrees. Prepare strusel. Combine all ingredients, beat 2 1/2 minutes. Spread 1/2 batter in pan, top with 1/2 of strusel. Add remaining batter and top with rest of batter and remaining strusel. Bake 35 - 40 minutes.

Jan 26, 2006

Homemade Bisquick

When I was growing up we always made pancakes on Saturday mornings. My mom used Bisquick to make them and they were always so good! I've been trying to use up some odds and ends from my cabinets that I rarely use like shortning , lemon curd and packets of unflavored gelatin. I figured that a homemade version Bisquick would be great for the shortning since my kids love pancakes just as much as I do. I have recipes in mind for the lemon curd and gelatin too so keep checking back, I'll be posting those soon.

Homemade Bisquick

4 c. flour
1/2 c. + 2 Tbsp. Non-fat dry milk powder
2 tbsp. baking powder
1 1/2 tsp. salt
1 c. Crisco trans-fat free shortning
(you can use any shortning you'd like but this is the kind I prefer)

Combine flour, milk, baking powder, and salt in a very large bowl. Cut in shortening until it resembles coarse cornmeal. Store in tightly closed covered container in a cool place. Makes about 5 cups.

Jan 25, 2006

My 'Lil Foodie :)


My oldest daughter turned 6 years old today. When we asked what she wanted to do for her birthday, she said she wanted to go for pizza, go to the mall and she wanted to go shopping at Trader Joes. :)

I made the cake she picked - chocolate with vanilla icing, dulce de leche filling and pink sprinkles.

Jan 24, 2006

Spinach and Artichoke Dip - ARF Tuesdays #4


In honor of ARF Tuesdays, I decided to make a dip. I love spinach dip (isn't that an ARF too?) so this time I made spinach dip with a bit of a twist. I added artichokes. It turned out yummy! I made some pita chips to go with it. Here's how I made it this time.

Spinach and Artichoke Dip

1 c. cottage cheese, pureed in the belnder
1/2 bag frozen spinach, thawed and drained
4 scallions, diced
1 can artichokes, drained and chopped
1 Tbsp. Penzey's Chip and Dip Seasoning (you can substitute a package of your favorite dip mix)
1/4 tsp. pepper

Combine all in a bowl and mix well. Chill for at least an hour then serve with warm pita chips.

Jan 23, 2006

Guest Blogger #6 - Cookin' With Cyndi

I am happy to introduce Cyndi from Cyndi Cookin' With Cyndi as my Monday Guest Blogger. I absolutly love Cyndi's blog, she and I think quite alike when it comes to recipes and she has so many I can't help but stop by every day to see what's new. Stop by and take a look, I'm sure you'll find something you will enjoy. :)

*************************************

Crockpotting

I am honored that Michele asked me to be one of her Monday guest bloggers. Michele has a second blog that’s all crockpot recipes, so I was inspired to wax nostalgic about the crockpot.

I bought my first crockpot in 1979, just before I graduated from college. A boyfriend named Corky (Corky? Yup; that was his name!) had one and used it all the time in his little garage apartment. He gave me my first crockpot recipe, Lime Chicken, and I use it often since it’s so simple.

That crockpot, an orange Rival, lasted until 1982, but was destroyed by the movers when we returned to the United States from Germany. My husband took pity on my grief, and immediately bought me a new one. Also Rival, also orange. It served me well for the next 23 years until it died last month. I was trying out a Chocolate Pudding Cake recipe from Fix It and Forget It, and for the first hour or so we were tortured by the aroma of chocolate coming from the kitchen. I soon noticed that I didn’t smell chocolate any more, but failed to check the pot. After dinner, I pulled out the serving bowls and the ice cream, stuck the spoon into what
appeared to be perfectly cooked pudding cake, and discovered that it was cold, uncooked, and absolutely disgusting underneath a thin layer of cooked cake. Gross. And so disappointing. (And I haven’t had the courage to try that recipe again!)

I knew I couldn’t give up crockpots, and I knew I had to have a new one immediately. The next morning I drove down to Redlands to Kohl’s. I found just what I was looking for. It’s not orange, but it’s still a Rival. It’s a silver and black 5-quart oval one, with a warmer switch in addition to the low and high switches. That’s a great feature, but the one I like best is the removable crock. I can take the ceramic crock out of the metal case! It’s so much easier to clean up than the old one. I’ve got a long list of recipes to try, and will be sure to post them all as I make them.

This is my favorite:

Hearty Italian Sandwiches

1 1/2 lbs. lean ground beef
1 1/2 lbs. bulk Italian sausage
2 lg. onions, sliced
2 lg. green peppers, sliced
2 lg. sweet red peppers, sliced
1 14-oz can diced tomatoes
1 t salt
1 t pepper
1/2 t crushed red pepper flakes
8 sandwich rolls (crusty or soft)
shredded Mozzarella cheese

In a skillet, brown beef and sausage; drain. Place a third of the onions and peppers in crockpot; top with half of the meat mixture and half of the tomatoes. Repeat layers of vegetables and meat, then top with remaining vegetables and tomatoes. Sprinkle with salt, pepper and pepper flakes. Cover and cook on low for 6 hours or until vegetables are tender. With a slotted spoon, serve about 1 cup of meat and vegetables on each roll. Top with cheese, if desired. Use pan juices for dipping, if desired.

Here’s the lime chicken, my very first crockpot recipe:

Lime Chicken

1 whole chicken, cut up (or a combo pack of pieces)
1/3 cup lime juice
1 teaspoon coarse ground black pepper

Put the chicken in the pot. Add lime juice. Sprinkle with black pepper. Cook 6-7
hours on low.

I’ve also used my crockpot for an old standby, pinto beans. My dad told me that when he was growing up during the Depression, his mother kept a pot of pinto beans on the stove all the time. They’re simply made; flavored only with some salt pork or bacon, and once in a while I add onions.

Pinto beans are high on the list of Antioxidant Rich Foods , too!

Pinto Beans

1 lb. dry pinto beans
water
4-6 oz. salt pork or bacon
1/2 c diced onion (if desired)
salt and pepper

In a large bowl or in the crockpot, cover beans with water, making sure you still have several inches of water on top of them (they expand). Soak overnight; drain and rinse. Cover with water again, leaving an inch or two on top. Dice salt pork or bacon, add to beans. Add onion, if desired. Turn crockpot on LOW and cook all day (8-10 hours). Season with salt and pepper.

Dad always ate his with cornbread, and I continue that tradition. This is an inexpensive meal with plenty of leftovers that can be used with Mexican food either left whole or mashed to make refried beans.

Last week I posted about the wonderful Beef Fajitas crockpot recipe that I had adapted from Kalyn’s chicken fajita recipe on Kalyn’s Kitchen. Try both. Either is fantastic! The pinto beans would make a good side dish, especially if you added some jalapeños to them.

http://www.cyndicooks.blogspot.com

Jan 22, 2006

Long Day

No new recipes to share today, it was a long one. We went to church this morning. Today I brought Blueberry Coffee Cake and Banana Bread, but I was not at all happy with either recipe so I won't be posting those. After church, we went out house hunting. We're hoping to move before the summer. So it was Burger King for lunch and frozen pizzas for dinner (Lean Cuisine for me, LOL). This Wednesday is my oldest daughter's 6th birthday so I'm going to be baking her a cake. I'll be sure to post pics. Tomorrow I'll have a new Guest Blogger to introduce, I know you will love the recipes, they are awesome!

since I started my newsletter this month I have received lots of great feedback, I just wanted to say thank you to all of you who have sent me such nice comments, it means a lot! I had a new idea recently. I enjoy sharing my recipes and finding new recipes so much. I was thinking of putting up a forum here at Chef Michele's Adventures. I have seen a couple of food blogs with forums and they seem to be well received. Any thoughts on this idea ... post a comment and let me know!

I am hoping to make up a few quick-mixes this week. I ran out of my Rice-A-Roni mix so I will do up another batch of that. I also recently saw a recipe for homemade Bisquick, so I am going to give that a try. I don't usually use baking mix but we have some Crisco left from a Christmas cookie recipe and I need to use that up. Besides those mixes I am hoping to make some more baked beans to put in the freezer because we ran out last week. I'm also going to do another batch of Butterscotch Cookies because my husband really loved those and they sure didn't last long last time I made them!

Hope you all had a great weekend!

Jan 21, 2006

A Meme in 7's

I've been tagged for a 7's cooking meme by Christina of Christina's Kitchen (Thanks Christina!) Here are my replies:

Seven Culinary Things to do Before I Die:

1. Prepare a 7 course meal
2. Buy a Kitchen Aid mixer
3. Have my own garden
4. Write a cookbook
5. Buy a GOOD balsamic vinegar
6. Bake a wedding cake
7. Teach my kids to cook

Seven Things I Can't do in the Kitchen:

1. Make non-greasy gravy from meat drippings
2. Flip a fried egg without breaking the yolk
3. Chop onions without crying
4. Keep the counter tops wiped down so they shine
5. Keep the sink free of dirty dishes
6. Put away everything I take out of the dishwasher
7. Keep the cabinets in perfect order so things don't fall out

Seven Things that Attract me to Food Blogging:

1. My recipes stay organized
2. Food bloggers are fun people
3. New ideas to try
4. Comments on my blog make me happy
5. Everyday food looks great in pictures
6. Memes are fun :)
7. It's more fun than playing games on-line

Seven Things I Say Most Often While Cooking:

1. "Get out of the kitchen, this is HOT!" (to my kids)
2. "Where the heck did I put that _________?"
3. "Ouch!"
4. "Taste this." (to my hubby)
5. "Come on and eat!" (to kids more interested in tv than dinner)
6. "Do you want a snack?" (to my wide eyed one year old who's holding out her hand to me)
7. ""No." (to kids requesting snacks 5 minutes before dinner)

Seven Cookbooks I Love:

1. The Joy of Cooking
2. The Tightwad Gazette (not really a cookbook but lots of recipes)
3. Daisy Cooks
4. The Fix It and Forget It Cookbook
5. Fix It and Forget It Lightly
6. Weight Watchers Complete Cookbook
7. A vintage Watkins cookbook a friend gave me

Seven Cooking Shows I can Watch Over & Over Again:

1. Rick Bayless
2. Daisy Cooks
3. Zonya
4. Everyday Food
5. America's Test Kitchen
6. Lydia's Family Table
7. Martin Yan

Now I tag Cyndi from Cooking with Cyndi, Paula from The Cookbook Junkie and Patti from Adventures in Food and Wine. :)

Jan 20, 2006

More Muffins


A few days ago I saw these very tasty looking muffins on Culinary In The Desert. Since we are trying to eat healthier I knew these would be great to try! I changed the ingredients a little to fit what I had on hand and they came out great. Thanks for the great recipe Joe! I also made this recipe in honor of The Savory Notebook's Virtual Recipe Club for January featuring Whole Grain Baked Goods.

Whole Grain Raisin Muffins
(adapted from Culinary In The Desert)

1 c. buttermilk
1/3 cup canola oil
2 eggs
1/2 cup sugar
1/4 cup molasses
3/4 cup All-Bran cereal, crushed
1/2 cup quick oats
1 1/4 cups whole wheat flour
1/2 tsp. cinnamon
1/2 tsp. mace
1/2 teaspoon salt
1 Tbsp. baking powder
1/2 cup raisins

In a medium bowl, mix milk, oil, eggs, brown sugar and molasses; whisking to combine. Stir in the All-Bran and oats. Allow this to set for 15 minutes to soften the All-Bran and oats. Preheat the oven to 425 degrees. In a medium bowl, whisk together the flour, cinnamon, mace, salt, and baking powder. Stir in the raisins. Add this mixture to the wet ingredients and stir just until combined. Lightly spray a 12 cup muffin tin with cooking spray. Evenly distribute the batter between the 12 cups. Bake for about 14 minutes, or until the top springs back when lightly touched. When done, remove the muffins from the pans as soon as you can handle them. Try not to leave them in the pan for longer than 5 minutes. Cool completely on a wire rack.

Jan 19, 2006

Ramen Noodle Salad

When I first saw this salad at a gathering we attended recently, I was not so sure I wanted to try it. It didn't look like something I'd like but I gave it a shot. It was SO GOOD! I went home and searched various sources on-line and came up with this recipe that I felt would best duplicate the one I had tired. It is best eaten right after it's made but you can store leftovers in the fridge for a couple of days.

Ramen Noodle Salad

Salad

1 bag of cole slaw mix
3 green onions, diced
1 package Oriental style Ramen noodles, crushed (keep the seasoning)
1/4 c. sesame seeds, toasted
1/4 c. sunflower seeds
1/4 cup sliced almonds
1 can mandarin oranges, drained

Dressing (make a day ahead for best flavor)

1/2 cup oil
1/4 cup sugar
1/4 c. honey
1/4 cup cider vinegar
1/8 teaspoon pepper
1 Tbsp. soy sauce
1 package dry seasoning from Ramen noodles
1/4 teaspoon salt

Put Ramen noodles in a bowl and add almonds, sunflower seeds and sesame seeds. Mix greens, noodle mixture and dressing just before serving.

Jan 18, 2006

Crispy Breaded Chicken Strips


The other night my hubby asked if I could make chicken strips. I make these often and they are so easy to make and very flavorful... a sure hit with kids and adults alike. I served these with peas and rice but I often make them with corn on the cob and baked beans or broccoli and noodles... they are versetile and if you pour some heated marinara sauce over them, top them with shredded mozzarella and heat them in the oven until the cheese melts you have an easy Chicken Parmesan.


Crispy Breaded Chicken Strips

2 lb. boneless, skinless chicken tenderloins
2 c. freshly grated bread crumbs
2 tsp. Italian Seasoning
2 Tbsp. freshly grated Parmesan or Parmeggiano-Reggiano cheese
2 tsp. Seasoned Salt, divided
1/2 tsp. pepper
1/4 c. buttermilk
1/2 c. mayonaise or plain yogurt

Combine bread crumbs, Italian Seasoning, cheese, 1 tsp. seasoned salt and pepper in a bowl. In a shallow dish, combine buttermillk, mayonaise or yogurt and 1 tsp. seasoned salt. Dip each piece of chicken in the buttermilk mixture then coat with the breadcrumb mixture. Place into a baking dish sprayed with non-stick cooking spray. Bake at 350 for 15 minutes, turn each piece then bake 15 more minutes.

Jan 17, 2006

ARF Tuesdays #3


I noticed that one of the ARF's on Sweetnick's list for ARF (Antioxidant Rich Foods) Tuesdays was Pinto Beans. One word from me on that - YUM! In fact I have a pot of on the stove right now and they smell so good, it's hard to wait.

I have to admit, among all the recipes I prepare, plan to prepare or just plain love to eat, pinto beans is right at the top. I love them for their flavor and versatility. I usually just make them with turkey bacon and salt for flavor, and we eat them with collard greens and corn bread. You can find that recipe right here. But I also love to make refried beans, bean soup, bean dip and bean burritos. I will be posting all of those recipes soon so stay tuned.

Jan 16, 2006

Guest Blogger #5 - Just Braise

I'd like to welcome Stacey from Just Braise as my guest Blogger this week. When I received her recipe my mouth began to water. Nothing is better than melt-in-your-mouth ribs! I can't wait to try this recipe.

I am now filling Guest Blogger spots for February and March so if you are interested, click my email link to the left and let me know!

A quick side note. If you are not signed up for my newsletter, please take a moment to do so. I'll be sending out issue #2 on Wednesday. The sign up form is to your left at the top.

Here's Stacey delicious recipe....


Bourbon-Pomegranate Molasses Beef Short Ribs w/ Broccoli Rabe

To braise, or not to braise, that is the question. Whether ‘tis nobler in the mind to purchase expensive meat and suffer the slings and arrows of outrageous fortune,-- or to fool your audience with inexpensive meat that melts in the mouth and is pure succulence.

I choose to fool, and with rave reviews.

Braising is the frugal gourmet’s trick on the audience: It turns tough meat tender. This is a process where one can throw everything-but-the-kitchen-sink into the pot, walk away, and return a few hours later to remove spectacular meat with little effort (I have discussed the process and various techniques more in depth in my first post of this New Year. I will also make the promise that more braising will be discussed this year, than last.) For tonight, it is beef short ribs.

As a child, I cannot remember ever eating authentic southern BBQ ribs. Steaks, BBQ chicken, hamburgers, hot dogs—those were all covered. I cannot recall once stepping foot into a BBQ joint until I was in high school. This moment was bliss and I often requested return trips.

My family did eat ribs though. There was only one location we ever consumed ribs: at New China Restaurant. We walked in, summoned by the larger-than-life giggling gilded Buddha that rested above the host stand, and soon sat at our regular table. I always thought we were so special sitting at this corner booth right near the bustling kitchen. Looking back, I am sure three young rowdy children are not a restaurant favorite. Regardless, their ribs were amazing, dripping with a soy-BBQ sauce that my family always had to order at least 2 plates of to satiate all.

But I have aged, and with age I have come to enjoy ribs beyond the comforts of the local Chinese restaurant. I still crave authentic southern BBQ. This is good since D is a southern boy: Tonight we summoned the southern kitchen.

On short ribs:
There are two kinds of beef short ribs. One is the shoulder (or chuck). These pieces are cut into individual rectangular slices, 2 to 3 inches long. They are thick, have layers of fat and connective tissue, and a thick bone running along them. The second kind of short rib is the short plate (underside of the chest). This is typically what you receive in a BBQ restaurant when you ask for “short ribs”. It usually consists of five connected ribs (numbers 6 to 10). This section is meaty but also contains a lot of connective tissue. Both cuts are tough and require long cooking (in this case braising) to soften them up.

When purchased in the supermarket, this cut of meat is a bargain. For tonight’s meal I purchased a package of chuck (loose) short ribs. They were large, meaty and marbled. They arrived in a package of 4, totaling just under $4. The rest of the ingredients are staples I generally have at home so with the broccoli rabe (about $2.50) this meal for two was about $7. I was happy with this math and returned home to braise. (Okay, the bourbon is not a staple, but leftover from a New Year party. This girl loves her hot toddies.)

Other notes on this recipe:
I combined and adapted this recipe from two I found online (one from starchefs, the other from epicurious). The pomegranate molasses can be substituted for regular molasses. I just happen to enjoy the sweeter pomegranate molasses. It is available in Middle Eastern markets (for about $1.50) or is now showing up in many general supermarkets (for about $3.00) in the Mediterranean food section. Whichever molasses you use, make sure to add it at the end of the cooking process. The pomegranate seeds in the braise process are also optional. I had some leftover seeds from a recent heavenly dessert and threw them in (as I said, everything-but-the-kitchen-sink.)

Bourbon-Molasses Beef Short Ribs w/ Broccoli Rabe
Makes 2 servings. Prep time= 20 min. Cook time= 2 hours


Bourbon-Molasses Beef Short Ribs
4 short ribs (Find ones with a good fat-meat ratio)
1 Tbl butter
4 cloves garlic, chopped
1 carrot, chopped
1 celery stalk, chopped
1 medium onion, chopped
1 jalepeño pepper, chopped (if a little spice is desired)
3 bay leaves
¼ tsp thyme
¼ cup bourbon
1 Tbl tomato paste
1-½ cups water
1 Tbl soy sauce
2 anchovy filets
seeds of ½ a pomegranate (optional)
1/3 cup pomegranate molasses (or regular molasses)
fresh ground pepper

1) Preheat oven to 350F. In an oven safe pot, or dutch oven, melt the butter over medium heat. Cover both sides of the short ribs with an ample amount of pepper and brown the ribs (about 3 minutes each side). In the braise process this initial quick heat process locks the juices inside the meat. Remove the ribs and place on a separate plate.
2) Add the garlic, carrot, celery, onion, jalepeño and anchovies. Sauté for 5 minutes.
3) Add bay leaves, thyme, bourbon, tomato paste, water, soy sauce and (optional) pomegranate seeds. Return ribs to pot, cover tightly and place in oven on center rack. Cook for 2 hours.
4) Once removed from the oven the sauce will have thickened and the aroma will be overwhelmingly delicious. Add pomegranate or regular molasses, stir and serve.


Broccoli Rabe
1 bunch broccoli rabe
2 Tbl butter

1) When there is 10 minutes left of the braising process above, warm a medium sized saucepot over medium heat with the butter. Add broccoli rabe, cover tightly and allow to sit for 5 minutes. Stir, cover again, and cook until leaves are wilted (about 4 more minutes). Remove and serve.

Jan 15, 2006

Meme and Menus

Cindy from Cookin' With Cyndi tagged me for the Me In 4's meme (thanks Cyndi) :)

Here are my answers... followed by my menus for this week.

Me in Fours 4's Meme

4 Jobs I've Had

1. Office Assistant
2. Tele-Marketer
3. Receptionist
4. Lab Assistant

4 Movies I Watch Over and Over

1. Little Women (The one with Winona Ryder)
2. Shrek
3. Grease
4. Annie

4 Places I've Lived

Can Arizona count 4 times? I've lived in two different cities here.

4 Websites I Check Daily

1. Google (personalized home page)
2. Google Reader (for updates on all my favorite blogs)
3. WAHM.com Forums
4. Cooking Light Forums

4 TV Shows I Love

1. Joyce Meyer
2. Jessie Duplantis
3. American Idol
4. 20/20

4 of My Favorite Foods

1. Pasta Salad
2. Sourdough bread
3. Hummus and pita chips
4. Freshly made tortillas

4 Albums I Can't Live Without

1. Winelight by Grover Washington, Jr.
2. Falling Into You by Celine Dion
3. Suit by Nelly
4. Stomp by Kirk Franklin

4 Places I'd rather be

1. By the beach in the Caribbean
2. In Italy
3. In New York City
4. In California

Now I tag Dawna from Always In The Kitchen and Alysha from The Savory Notebook. :)

Here are the menus I have planned for the next two weeks.

Jan 15 - pinto beans, corn bread, collard greens
Jan 16 - tostadas, refried beans, calebacitas
Jan 17 - Great Northern beans, corn bread and collard greens
Jan 18 - leftovers
Jan 19 - aloha chicken, brown rice
Jan 20 - bbq chicken, corn on the cob, baked beans, green beans
Jan 21 - ground turkey casserole
Jan 22 - leftovers
Jan 23 - pizza
Jan 24 - roast beef, potatoes, carrots, broccoli
Jan 25 - leftovers
Jan 26 - taco soup with barley
Jan 27 - leftovers
Jan 28 - pinto beans, corn bread, greens
Jan 29 - leftovers
Jan 30 - chicken stir fry, rice
Jan 31 - spaghetti

Jan 14, 2006

Mango Bars


I was looking for recipes to make for church on Sunday since we bring treats with us to share with everyone. I decided this week to make French Breakfast Muffins but wanted something else to bring as well. I found a recipe for Apple Butter Bars on-line and decided to modify it a bit for the ingredients I had on hand. These turned out really crumbly on top but cut easily. I think they will be a hit!

Mango Bars
(modified from Food Down Under)

3/4 c. shortning
3/4 c. brown sugar
1 1/4 c. whole-wheat flour
1 1/2 c. rolled oats
1 tsp. cinnamon
1 tsp. vanilla
1/2 tsp. nutmeg
1/4 tsp. salt
3/4 c. mango sauce (purchased at Trader Joe's)

In a medium bowl, cream shortning and brown sugar. In a second bowl, stir together flour, rolled oats, cinnamon, vanilla, nutmeg and salt. Add to creamed mixture and stir just to combine. In a greased 9- by 9-inch pan, press in half of the batter. Cover with the mango sauce. Top with remaining batter and press down firmly. Bake in a 375 degree oven for 25 to 30 minutes. Cut into bars.

Jan 13, 2006

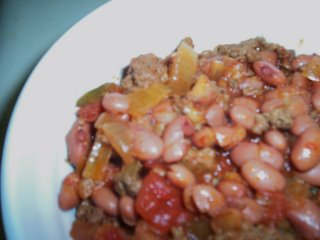
Crock Pot Chili #2

Beans are a staple around our house. Be it crock pot chili, red beans and rice or just plain pinto beans, we eat them often. Tonight I made chili, but I used a slight varation on my usual recipe and it was different enough that I thought I would post the recipe. I actually like this version better, the flavor is deeper and richer.

I apologize for the poor photo quality lately, I have been having some problems with my camera and hope to have those resolved by this weekend (need to find time to sit down and read the booklet that came with it, LOL).


Here's my new and improved chili. We prefer ours not to be so spicy because hubby and the kids can't handle it but if you'd like to kick it up some, just add a chopped chili pepper like a jalapeno or habanero.

Crock Pot Chili #2

1 lbs. ground beef
1 c. dry small red beans (cooked)
3. c. water (or cooking liquid from beans)
1 medium onion, chopped
1/2 c. each red, yellow and green bell pepper, chopped
1 clove garlic, minced
1/2 tsp. pepper
1 tsp. ground cumin
1/4 tsp. crushed red pepper
3 Tbsp. chili powder
1 Tpsp. parsley
1/4 tsp. oregano
1 (15 oz.) can diced tomatos with bell peppers and onions
1 8 oz. can tomato sauce
1-2 tsp. salt
1/2 tsp. cocoa powder
pinch of brown sugar

Brown ground beef, drain. Add all ingredients to crock pot. Allow to simmer 6 hours on low. Serve topped with cheese and sour cream, with rice or crackers on the side.

Jan 12, 2006

Butterscotch Cookies

Thanks everyone who wished me well yesterday. I do feel much better now, thanks!

With one stray stick of butter in my freezer from holiday cookie baking, I felt it time to bake even MORE cookies. I found this recipe on the recipe message board over at WAHM.com and I knew I had to try it! Anything caramel or butterscotch is always a hit in our house. These are not much to look at but they taste great! I pressed down the second sheet full with a fork to flatten them a bit because they don't seem to flatten out on their own.

Butterscotch Cookies
(from MMM-Cookies)

1/2 cup butter
3/4 cup brown sugar
1 egg
1 tablespoon milk
1 teaspoon vanilla
1/2 teaspoon baking powder
1/8 teaspoon salt
1-3/4 cup all-purpose flour

Preheat oven to 375°F.

Lightly grease cookie sheets or line with parchment paper. Cut the butter into small pieces.
Put in a large microwave safe bowl and melt for 30 seconds then at 10 second intervals.
Add brown sugar; stir until sugar is dissolved. Let cool for just a few minutes.Beat in egg, milk, and vanilla.Stir in flour, baking powder, and salt. Drop by the spoonful on to cookie sheets about 2" apart. Bake 12-14 minutes or until edges are browned. Let cool on cookie sheet 1 minute then transfer cookies to wire racks to cool completely. Makes 2 dozen cookies.

Jan 11, 2006

Under The Weather

Sorry for the lack of posts yesterday and today. I have been a bit under the weather. I should be back tomorrow so stay tuned :)

Don't forget to check out the ARF Tuesdays round-up at Sweetnicks.

I received a package in the mail today from my sweet friend, Lynn Terry. Take a look at the adorable Kitchen Fairie she sent me :)

Jan 9, 2006

Guest Blogger #4 - Dispensing Happiness

Today I would like to introduce you to my 4th guest Blogger, Stephanie from Dispensing Happiness. She has a very cool blog with delicious recipes and photos too. Take a look, she's done a great job! Stepahine also hosts a really fun blogging affair every 3rd Thursday of the month called Blog Party. This event is a virtual cocktail party in which food bloggers share appetizer and cocktail recipes. You can learn more about her event here.

----------------------------------------------------------------------

What a great community we food bloggers belong to.

Sweetnicks contacted me a couple of weeks ago. She told me about a new-to me blogger, Chef Michele, and how she was looking for 'guest speakers', if you will.

And oh; would I be interested in signing on?

Why, yes; yes I would!

Greetings to Chef Michele's readers from Dispensing Happiness!

When I was asked to share my frugal two-cents' worth, I admit I was temporarily stumped.

It's not that Matt and I regularly add Brie, Champagne and black truffles to our grocery list. It's just that we don't plan our meals around a budget (do I get kicked off the island for admitting that?).

That said, we do have a few low-cost, worn-around-the-edges recipes we like to pull out a few times a month.

One of my favorites is a simple and filling Fried Rice.

When I decided to become a vegetarian (just over ten years ago), I began to experiment with 'ethnic' foods. I don't know if the only major grocery store in my hometown had only recently added their sections of 'Asian', 'Mexican', and even 'German' foods, or if my search for 'things I could eat that don't use meat' caused me to finally notice them; regardless, I discovered a seasoning pack for fried rice. I found water chestnuts. All sorts of new ingredients.

I had always been a bit cautious about food (thank heavens I've outgrown that!), so I surprised myself by taking all those new foods home, and making fried rice for the very first time.

Ok. That 'first time' wasn't spectacular, when you consider I used Uncle Ben's 10-minute rice and a seasoning packet. But it was a start!

Once Matt and I merged our households, fried rice became a slightly classier affair.

No more pre-packaged seasonings. And Uncle Ben was banished from the cupboards.

But we still love a warm bowl of fried rice. And when you take a look at the recipe, you realize just how economical it is.

Rice is pretty inexpensive. We buy ours in 10-lb bags, and it lasts for months.

The sesame oil, while not cheap as an initial purchase, is used sparingly. Ostensibly, you could go twelve months before needing a new bottle.

Thrifty tip: Buy your ethnic ingredients from ethnic grocers. It's much cheaper, and the quality often higher, than what you find in supermarket chains.

Example: a 1.5 oz. jar of cumin at Kroger costs $3.49. The 7 oz. package of cumin we recently purchased from an Indian/Pakistani grocer cost $1.79. You do the math.

And the best part? Fried rice is a great way to use up the odds and ends kicking around in your refrigerator and freezer. The tail end of vegetables, that half of a chicken breast? Whatever you want to use, toss it in.

Because my son and I are vegetarians, we use vegetarian deli ham as our 'meat', but feel free to include any type of meat or seafood you have lying around. Same for vegetables. We tend to use carrots, peas and water chestnuts. Bamboo shoots, celery, zucchini, bell peppers (sparingly); whatever catches your fancy.

Most of all, it's a good meal that doesn't break the bank.

Enjoy!


Fried Rice

6 c. cold, cooked, rice
1 carrot, sliced
1 scallion, sliced
1 c. frozen peas
1 c. cooked, finely diced, meat of your choice
1 lb. firm tofu, drained and diced
2 small cans water chestnuts (we used sliced)
1 Tbl. ginger, grated
1 Tbl. garlic, mashed or finely chopped/garlic paste
4 eggs, lightly beaten
4 Tbl. soy sauce
2 Tbl. sesame oil
hot oil to taste
vegetable oil

In a wok or skillet, heat 3 Tbl. vegetable oil. When very hot, add tofu and fry, stirring frequently, till golden and firm. Remove from oil. Drain and reserve.

Return wok or skillet to very high heat. Add additional vegetable oil if needed. Crumble the cooled rice into the wok or skillet with damp hands. Start stirring with a wooden spoon, with a cutting motion, to break up any clumps. Stir in and give each a minute to cook: carrots, frozen peas, water chestnuts, meats, and scallions.

Push rice to one side of wok or skillet. Pour eggs into space; as they begin to cook, incorporate them into the rice.

Add ginger, garlic, soy sauce and oils; stir into rice.

Add reserved tofu, mix into rice; cook until heated through, and serve.

Jan 8, 2006

Sopita

I come from a very diversely ethnic background...in case you hadn't already noticed from my recipes :) When I was growing up one of the things my mom made for us at lunch time was Sopita. In Spanish Sopita means "little soup". You can add any number of this to this such as chopped cilantro or diced green chilis, bits of meat like shredded chicken, bits of bacon or ground beef. This is the first time I have taken the time to figure out the exact measurements of the ingredients. It's one of those things you just make from memory. This was the first thing I ever learned how to cook.

Sopita

1/2 lb. small pasta such as elbow macaroni, small shells or Fideo
1 Tbsp. canola oil
1 Tbsp. Caldo de Pollo or Chicken Bouillon Powder
1 small can tomato sauce
1/2 tsp. garlic powder
1/2 tsp. chili powder
1/4 tsp. cumin powder
grated cheddar cheese

In a medium sauce pan, heat oil until you see ripples form. Add pasta and spices and stir until fragrant and lightly toasted.

Add tomato sauce and 4 tomato sauce cans full of water.

Bring to a boil, stir then turn down to a simmer. Allow to cook, stirring occasionally until pasta is tender. Add a handfull or two of shredded cheddar cheese. Serves 4.

Jan 7, 2006

Spice it up!


In my kitchen spices are not just an necessity, they are more of an obsession. I stock the basics of course, but I can never resist a new and exotic sounding spice blend. Some of my recent additions are Sate Seasoning and Florida Seasoned Pepper (all from Penzey's). Although it is fun to buy all these goodies, it can get quite costly. So, in an effort to spice things up, I have taken to mixing some of my own blends.

One of the first homemade mixes I ever learned to make is not really a spice mix, but a soup base. I was using a lot of cream of chicken type soups to make casseroles at the time and those little tiny cans can get quite costly. Making a sort of "white sauce" can often duplicate a cream soup, but they can sometimes be time consuming. A mix was just what I needed to help out on those nights when time was an issue.

Cream of Anything Soup

4 c. dry milk
1 1/2 c. corn starch
1/2 c. chicken bullion powder
4 tsp dried minced onion
2 tsp. thyme
2 tsp. basil
1 Tbsp. dried parsley
1/4 tsp. paprika
1 tsp. pepper

Mix all together and store in an airtight container. To use the mix add 1/3 c. mix to 1 c. cold water. Whisk and heat in a saucepan whisking until thickened. You can customize this soup mix with cooked chopped broccoli or asparagus, small shrimp, diced cooked potatos, chopped celery, chopped mushrooms, minced cooked chicken, etc.

I have more mix and seasoning recipes listed under Mixes, Seasonings, Sauces and Condiments. It's a coincidence that as I was preparing this post I stumbled upon a post about spices at Always In The Kitchen. Dawna has a great sounding recipe for Garam Masala, take a look! She has a beautiful spice rack as well. I really need to get one of those... (adding spice rack to mental note of things to buy for the kitchen).

Jan 6, 2006

Cupcakes and Quick Breads

I hope you've all been enjoying my Guest Bloggers this week! I know I sure have enjoyed some new and delicous sounding recipes. I'll have a new guest every Monday so be sure to stop back by and see who's visiting :)

I recently saw the most beautiful looking Chocolate and Peanut Butter Cupcakes on The Baking Sheet so of course, since I had the ingredients on hand I had to try them! My kids did not have a problem being the guinea pigs for a new recipe involving their two favorite flavors. I made a couple of changes to the recipe. First of all I added buttermilk in place of part of the regular milk called for because I love buttermilk in anything chocolate. I also added cinnamon. To me chocolate tastes incomplete without cinnamon, but that is a personal preference.


Chocolate Cupcakes
(recipe modified from Culinary Epiphanies)

1 ½ cups unbleached, all-purpose flour
¾ cup cocoa powder
¼ tsp baking soda
2 tsp baking powder
¼ tsp salt
¼ cup butter, very soft
1 cup sugar
½ cup brown sugar
2 eggs, room temperature
1 tsp vanilla extract
1/4 tsp. cinnamon
1/2 cup milk, warm
1/2 cup buttermilk, warm

Preheat oven to 350F. Line 24 muffin cups with paper liners. In a medium bowl, sift together flour, cocoa powder, baking soda, baking powder and salt. In a large bowl, cream together butter and sugars.eat in eggs one at a time. Add vanilla. Add flour and milk, alternating in 3 additions, ending with flour. Evenly distribute into prepared muffin tins. Bake at 350F for 15-17 minutes, until a tester comes out clean and the cake springs back when lightly pressed.
Cool completely on a wire rack. Makes 18.

Peanut Butter Frosting
(recipe originally from Cullinary In The Desert)

2 tbsp peanut butter
1 tbsp butter
1/4 cup sugar
1/4 cup milk
2 cups confectioners sugar

In a small saucepan over low heat, melt peanut butter and butter and dissolve sugar. Remove from heat and whisk in milk. Transfer to a medium bowl and set aside to cool completely.
Add confectioners sugar and beat on medium/high speed with an electric mixer, until smooth and fluffy. Spread on cooked cupcakes. Will frost 18 cupcakes (approx. 1 1/2 cups).

(I topped each cupcake with a slice of Reeses peanut butter cup)

Since I was in a baking mood, I also made a couple of quick breads. I am planning to take these with us to church this Sunday to share with the members of our church. I found these recipes on-line (I can't for the life of me remember where) and I changed them up a bit. They smelled wonderful baking. I have a photo of them which is not much to look at. I find that most quick breads don't have a lot of eye appeal but they taste great and are very moist. I think these will fit that bill as well!


Strawberry Banana Bread

3 cups all-purpose flour
1 tsp. baking soda
1 tsp. salt
2 tsp. tablespoon cinnamon
2 cups granulated sugar
4 eggs
1 cup vegetable oil
1 tsp. vanilla extract
2 cups frozen strawberries, thawed and diced
1 over-ripe banana, mashed well
1 1/2 cups chopped nuts (optional)

Preheat oven to 350 degrees F. Grease two loaf pans. Combine flour, baking soda, salt, cinnamon and sugar. Stir in 4 beaten eggs, oil, strawberries, banana, and nuts. Combine all ingredients until well moistened. Pour into prepared loaf pans. Bake for 65 minutes. Cool before removing from pans.

Carrot Cake Bread

3 teaspoons baking soda
1/2 teaspoon salt
2 teaspoons ground cinnamon
1 teaspoon ground nutmeg
3 cups all-purpose flour
3 carrots
1 (15 ounce) can crushed pineapple
1 1/2 cups canola oil
2 cups sugar
6 eggs
1 cups raisins
1 cup chopped walnuts (optional)

Preheat oven to 375 degrees F (190 degrees C). Grease and flour two 9x5 inch loaf pans. Sift together baking soda, salt, spices, and flour. In a large bowl, combine ground carrots, pineapple, oil, and sugar. Mix in eggs. Blend flour mixture into carrot mixture. Mix well. Fold nuts and raisins into batter. Pour into prepared pans. Bake at 375 degrees for 45 minutes, or until a toothpick inserted into bread comes out clean.

NOTE: I cut both recipes in half for today but normally I'd go ahead and make the two loaves.

Jan 5, 2006

Guest Blogger #3 - Plugged In Homeschool

I'm happy to welcome Barbara from Plugged In Homeschool as my third Guest Blogger for this week. She's got a great blog about homeschooling so if you homeschool or if you are considering it, take a look! She has some awesome resources.

I hope you all have been enjoying the posts from my guests! Barbara is my last guest this week and I will have a new guest each Monday from now on. I am always happy to hear from anyone interested in being one of my guests, so if you are interested, just drop me a line at chefmichele@gmail.com. I'll be back tomorrow with a recipe I think you'll really love and I have batteries for the camera now so I'll have pics too :)


**********************************

Yes, We Can Can Chili
from Barbara at Plugged In Homeschool

Hi everyone! I'm guest blogging for Michele today. We both homeschool and write, so I guess we have quite a bit in common. I write a blog at http://www.pluggedinhomeschool.com. My goal at PIH is to help homeschoolers learn about tech topics, good websites, software, and the like. Like most homeschoolers, we live on a tight budget, and have learned some techniques for cheap cooking.

Personally, I like recipes that are cheap, easy, nutritious, taste good, don't require advance planning, and are liked by everyone. That's a tall order for a recipe, isn't it! One that fits the bill is what I call "Yes, We Can Can Chili". I always think of the old Pointer Sisters' song "Yes, We Can Can" when I make this because I basically just open cans!

Well, there's a little more to it than that. As far as advance prep goes, it's always nice if you have cooked ground beef and chopped green peppers ready to go in the freezer. Actually, I usually use ground turkey, costs less, less fat, and we all like the taste! Anyway, a nice make-ahead tip is to brown 4 or 5 pounds of meat all at once when your cooking, and store the extra in the freezer. (Four pounds is about all my skillet can handle.) If you garden, or get a chance to get some green peppers cheap when they're in season, be sure to chop them up and store them in a freezer bag in the freezer. You can take out as much as you need anytime.

If you don't have cooked meat on hand in the freezer, this recipe can be made with TVP, too. For anyone unfamiliar with TVP, it's a soy meat substitute that we buy in bulk from the health food store. It's dry, so you can keep it indefinitely. Just soak in an equal part of water and it reconstitutes, and can be used like ground meat crumbles. It's quite inexpensive, but not as tasty as real meat (IMHO.)

To make "Yes, We Can Can Chili," simply combine the following ingredients in a large pot. (Adjust the portions to fit the size of your family. We have 4 kids, ages 12 and up, so I tend to think in large portions.)

Equivalent of 1½ to 1 pound of ground beef, cooked

2- 15 oz. cans of chili beans

1 quart home canned tomatoes or the equivalent. This can be whatever you have on hand. I've used canned diced tomatoes, tomato sauce, tomato paste with water, odds and ends of salsa that is getting old, etc. I suppose a can of spaghetti sauce could even be used (for an "international" dish).

½ cup chopped green peppers

1 can whole kernel corn (which results in another nickname for this dish, "Chili con Corny".

Seasonings to taste, including onion and garlic powder, chili powder (quite a bit, depending on the beans), cumin (nice taco-flavored touch), celery powder, salt and pepper.

Add water if it's too thick to heat up without scorching. Heat it up and eat it up!

You may notice I don't make a big deal about chopping up an onion for this. I must admit, I am not a big onion fan, but I like the flavor of dried onion, just not too much. Garlic, now there's another story! As for onions, I recently discovered that I like pot roast and beef stew much more if I don't put in any onion at all! (Many of you are probably aghast at that suggestion!)

Anyway, come on over and visit me at Plugged In Homeschool some time. I've been trying to feature a weekend tech how-to article every Saturday. Don't worry, if I write it, it'll be simple!

God bless you all!

Barbara

Jan 4, 2006

Guest Blogger #2 - Sweetnick's

My second guest blogger for this week is Sweetnicks. If you have never visited her site, take a look it is great! Lots of wonderful recipes and the largest list of food blogs I have found anywhere. I know you will all enjoy these recipes, they sound wonderful!

***************************************************

When I found out that Michele was looking for guest posters for her website, I jumped at the chance. I asked what the guidelines for my post should be and Michele said, "as long as it's frugal or food-related" that would be great. I knew immediately what I would do.

When I moved out of my parents' house and into my first apartment, I dove into Woman's Day and Family Circle magazines, feverishly clipping out their recipes. I loved using them as a source because they always list how much it costs to make the recipe, and given it was my first time living on my own, although I didn't always follow a budget, I did try and keep an eye on costs ... most of the time. ;) Now 10, 15 years later, although I still subscribe to those magazines, I've moved on to include others as well, like Cooking Light, Bon Appetit, Gourmet and more. But going back to my Woman's Day/Family Circle eat-on-a-shoestring days, I often challenge myself to "cook out of my pantry," choosing to use what I have here already, instead of arming myself with a list and running to the store to buy more ingredients.

So to combine both topics of "food" and "frugal," tonight's dinner is using up stuff I had at home already. Theoretically, you could say it didn't cost me one cent to make dinner, since I already had everything on hand; but if you add up what I spent when I originally bought the ingredients, it's about $8, and that will cover dinner for the 3 of us tonight, and leftovers for tomorrow. Not too shabby! Not sure where we could go for dinner for $4/night, but I doubt it would be as good as this meal. :)

Somehow I ended up with an abundance of lemons ... I think from our New Years' Eve feast this past weekend, so I knew I wanted a recipe to use those up. Turning to a tried-and-true, we'll be having Giada DeLaurentiis' Lemon Spaghetti. Got lemons? Make spaghetti. I know ... not the usual solution, but it's a great, quick to table, weeknight meal, and Nicholas gobbles it up. Starting dinner off first though will be Spinach Salad with Dried Cranberries and Cheese. This is one of those great, throw-together salads that will work any number of ways. Usually I'd buy gorgonzola to crumble on top of it, but we're cooking from what I have on hand today, so it'll be cubed, marbled Jack/Colby cheese - yummy stuff. The dressing is a mixture I make with maple syrup (warmed to thin it a bit), olive oil, salt, pepper and a few splashes of balsamic vinegar. This is another dish that Nicholas dives into --- just don't tell him he's eating spinach! He thinks he doesn't like it. And lastly, I had some extra heavy cream and eggs leftover from Christmas, so I'm making one of The Husband's favorite desserts, my Creme Brulee. The simplest recipe ever ... Creme Brulee doesn't have to be reserved for just when you order it from a restaurant, and with my recipe? No torch required.

So next time you're trying to figure out what to make for dinner, throw open your cupboards, refrigerator, freezer and pantry and start rummaging around. You'd be surprised what you can come up with using items you already have on hand. In fact, last night, I made Eggnog Rum Raisin Muffins, using ingredients I already had. And for anyone who happens to visit my site regularly, you'll know that today is The Husband Cooks Wednesday, so while I may have planned the menu, you know who's doing the cooking...!

Giada DeLaurentiis' Lemon Spaghetti

1 pound spaghetti
2/3 cup olive oil
2/3 cup grated Parmesan
1/2 cup fresh lemon juice (about 3 lemons)
Salt and freshly ground black pepper
1 tablespoon lemon zest
1/3 cup chopped fresh basil leaves

Cook the pasta in a large pot of boiling salted water until tender but still firm to the bite, stirring occasionally, about 8 minutes. Meanwhile, whisk the oil, Parmesan, and lemon juice in a large bowl to blend. Drain the pasta, reserving 1 cup of the cooking liquid. Toss the pasta with the lemon sauce, and the reserved cooking liquid, adding 1/4 cup at a time as needed to moisten. Season with salt and pepper. Garnish with lemon zest and chopped basil.

Creme Brulee

7 egg yolks
7 tablespooons sugar
3-1/2 cups heavy cream
1-1/2 teaspoons vanilla
extra sugar for sprinkling the tops

Heat cream and vanilla until very hot. Beat eggs with sugar until light and creamy. SLOWLY add hot cream to egg mixture and stir well. Evenly divide mixture into ramekins. Place cups in a 13x9 baking pan filled halfway up with water. Bake at 350 for 45 minutes. Remove from oven and cool, then refrigerate. If you make them ahead, pull them out of the refrigerator about a half-hour before serving, and then immediately before serving, sprinkle about 1/2 teaspoon of sugar on top of each cup and broil until golden brown and crunchy. Makes about 8-10 ramekins, depending on the size of yours.

Jan 3, 2006

ARF Tuesdays #1

I was so excited when Sweetnicks announced that she was hosting ARF (Antioxidant Rich Food) Tuesdays! When I first announced that I was going to participate in this event and looked at the list of foods involved, I realized that we already eat most of these on a regular basis and some on a daily basis.

One ARF I eat every day is blueberries. Usually I buy organic frozen blueberries and eat them in oatmeal or smoothies for breakfast. Then I discovered blueberry juice and that has been added to my regimen as well. Since I started eating blueberries on a regular basis over the summer I have not been sick once! The power natural foods is amazing!

The recipe I am going to share today, I originally found on Always in the Kitchen. I modified it a bit to suit my family's tastes and we absolutely loved it. This one will be on our table on a regular basis for sure!

Red Beans and Rice Jamaican Style
(modified from Always in the Kitchen)

1 teaspoon canola oil
1 medium onion, diced
2 cloves garlic, minced
2 cups cooked kidney beans (drained and rinsed, if canned)
160 ml coconut milk plus water to make 1 cup liquid
1/2 link of smoked turkey sausage (kielbasa style), cut into small pieces
1/2 teaspoon Creole seasoning (you can get this on-line at Cajun Supermarket)
1/2 teaspoon thyme
1/2 teaspoon salt
1/2 teaspoon pepper
1/4 teaspoon ground sage
1/4 teaspoon ground allspice
1 cup uncooked long grain rice
1 medium red bell pepper, diced
sliced green onions to garnish

In a Dutch oven with a tight-fitting lid, cook the diced onion, garlic in the canola oil until it starts to turn translucent. Add the beans, coconut milk, turkey sausage, bell pepper and spices, and bring to a boil. Let cook, stirring, for about a minute, and then add the rice and 1 & 3/4 cups boiling water. Bring the mixture back up to a boil, stirring, then immediately cover. Turn down the heat to a bare simmer and do not open the lid for 25 minutes. Sprinkle with green onions and serve.

Jan 2, 2006

Guest Blogger #1 - Tummy Rumble

To kick off my new weekly Blogging Event I am pleased to introduce you to three guest bloggers this week. Our first is Manne from Tummy Rumble. Manne lives in the UK and have a great blog so hop on over and take a peek! The recipe he is sharing today is so awesome, I can't wait to try it!
****************************************

My Great Auntie Olga's Caramel Toffee
From Manne at Tummy Rumble


In my family, Christmas nowadays is kept small. Since the divorce between my mum and dad we don't get together in the "big family way" we used to. We've also basically stopped the whole gift thing and decided to focus on food and drink and having a good time talking and reminiscing instead.

Going home to Sweden for Christmas this year I thought a bit about the lack of traditions, Christmas rituals, in my family. We don't really do much these days, I thought, other than meet, hang out, eat and talk. When I was a kid it was different, we used to do all those things I have come to associate with Swedish Christmas, which as you may know is celebrated on Christmas eve and not Christmas day.

Me and my brother of course used to wake up early and rush down to the lounge room where the really big Christmas tree somehow as if by magic had opened its' lower branches to reveal a mountain of gifts. All wrapped in colorful paper, with little cards with rhymes on them. To keep us busy mum and dad always bought a bunch of books and magazines, that they put underneath the Christmas goat, standing next to the tree. The deal was that we could take anything that was underneath the goat, but we couldn't touch any of the gifts under the tree.

Those magazines usually kept us busy until TV started and mum started fiddling about in the kitchen getting everything ready or we all got in the car to go over to my cousins, depending on which year it was. Then late lunch, a real feast, after that Donald Duck on telly and finally we would hand out the gifts (which by now of course had been thoroughly examined, squeezed, shaken and marveled over by all the kids).

Since we don't do gifts anymore, and me and my brother no longer need to be kept busy with magazines until we can sit down at the dinner table, focus these days is on food. So when Christmas comes around mother starts pulling out all those old recipes, that she has inherited from her mother, who got some from her mother, others from her aunt and so on. While sitting there on the train, headed for my home town, I started thinking about all that food and candy. Mum's home made onion pickled herring, her marvelous and juicy spare ribs, the Christmas ham in its' golden cover of breadcrumbs and mustard, the brown and green cabbage, the caramel toffee that we always have for Christmas and only then... There it struck me. We have lots of traditions still, all in the form of recipes. And they date back generations, handed over on small hand scribbled notes or just by mouth and memory.

Never given it much thought, I suddenly felt a bit silly that even though I am quite the foodie not even once ever asked my mum how she did all that food, or where she got the recipes from. So this year I decided to start the pleasant work of making sure those traditions live on. Starting with that typical Christmas candy, a caramel toffee concoction, I am going to try to learn how to make all those typical family things we always have had on our Christmas table.

As I asked my mum about the recipe for that candy, she told me that this particular treat is known in our family as "Aunt Olga's caramel toffee". Apparently my grandmother's father's sister Olga is credited with the origin of this recipe.

There aren't very many ingredients, making it look deceivingly simple to make. Don't let that fool you however, getting toffee right seems to be an art form... My mother warned me, saying that it is almost impossible to get two different batches look and feel the same. Either they get hard and crunchy, or they get soft and chewy. Taste is generally about the same though, a rich, creamy taste that I associate very much with Christmas.

Having learned the hard way that my mum usually is right, I realized when reading the brief instructions that this may be the hardest thing I ever set out to cook. Sure, that twice cooked pork fried in Chinese master stock was a long and complicated process involving lots of ingredients, but this... I am not sure, it seems to require a lot of fingerspitzgefühl. But I am probably going to have fun trying to get this right everyChristmass.


Ingredients

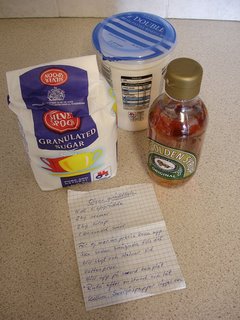
4 dl double cream
200 gr sugar
200 gr syrup
a small piece of butter (tip of a knife)


Instructions

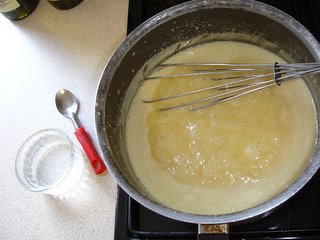
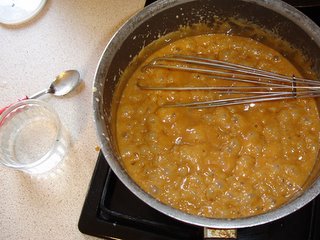
Mix the ingredients together in a sauce pan and bring to a gentle boil. As soon as it starts boiling, lower the heat just enough to keep it simmering.


Let the mixture simmer until it goes thick (can take well over an hour), then do the "water test": take some of the mixture on a spoon and drip it in a glass of water. It should solidify as it hits the water and turn into a solid, spongy drop of caramel.


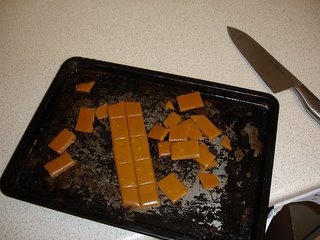
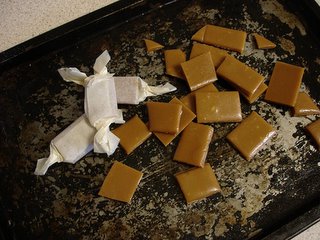
Butter a baking plate and pour the mixture on top, it should be a layer about three to five mm thick. Let cool for a while and then using a sharp knife cut it into bite sized pieces. Then let it cool entirely. Once cool and stiff, break pieces apart and wrap in grease proof paper.


Here's a tip. Once poured on the plate, leave it to settle for a while and then make lines with a knife, criss crossing the toffee in bite sized pieces. Then put the whole plate in the freezer for a few minutes, it makes it so much easier to break apart the pieces.


Wrapping all the pieces in individual papers was quite boring work, but it felt good doing it, knowing that I am actually doing something that has been done in my family for generations. And you know what? They even taste the same as grandmother's.


********************************************
Note from Michele: I attempted to convert the measurements and ingredients in Manne's recipe for us US folks and I believe they should read as follows:

1 3/4 c. double cream (or heavy cream if you can't find double cream)
1 c. sugar
1 c. Golden Syrup (or use corn syrup if you can't find Golden Syrup)

Jan 1, 2006

Happy New Year!

Happy 2006 everyone! It's so exciting to be ringing in a new year... all the plans and fun that lay ahead! I feel that for our family this is going to be an exciting year. I hope you are enjoying a nice relaxing day with your families.

Last night the cooking bug bit me. I have been in the mood to bake bread lately but haven't had much time to myself. I found this awesome recipe for Sesame Twists on Words To Eat By that seemed very simple and I knew the kids would enjoy helping since it looked really quick to make as well. I changed the recipe a bit to go with the spaghetti and meatballs we had and it turned out great! Instead of making these into a twist shape, I coiled them and baked them in the awesome new Pampered Chef muffin pan my sweet sister got me for Christmas (... thanks Pam :) ...) The texture of these rolls was somwhere between a biscuit and a yeast roll. Here is my version of this wonderful recipe.


Garlic and Herb Sesame Rolls

2 ½ cups all-purpose flour
2 tsp. baking powder
1 tsp. salt
1 tsp. garlic powder
1 tsp. Italian seasoning

½ tsp. baking soda
¾ stick (6 Tbsp.) butter, melted and cooled
1 egg white, lightly beaten
1 cup Cheese Style Greek Yogurt (I got this product from Trader Joe's but you can certainly use sour cream as in the original recipe or homemade yogurt cheese)
4 - 5 Tbsp. milk
1 egg, lightly beaten

2 Tbsp. sesame seeds, toasted

Preheat oven to 450°F. Whisk together flour, baking powder, salt, garlic powder, Italian seasoning and baking soda in a large bowl. Whisk together butter, egg white, and yogurt cheese or sour cream in another bowl, then add to flour mixture and stir with a fork until a dough just begins to form. Add milk a little at a time if dough seems too dry, if not then omit the milk. )My dough was a bit dry).

Turn dough out onto a well-floured surface and knead gently 6 times. Pat out dough with floured hands, re-flouring surface if necessary, and form into a 12-inch-long log. Cut dough into 12 equal pieces. Roll each piece into an rope using well-floured hands, then coil each rope and pinch the end onto the coil so it won't come apart.

Put each coil into one section of a muffin pan.
Toast sesame seeds in a dry skillet, stirring, until they begin to pop. Remove from heat and set aside. Brush tops of each roll with egg and sprinkle generously with sesame seeds. Bake until golden, 12 to 15 minutes. Transfer to metal racks and cool completely.